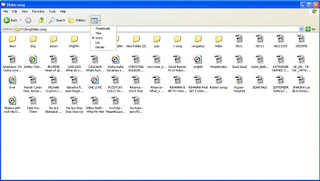
Now that you have a specific template selected for your folder, you will have a more advanced feature list to work with so that you can display a lot of useful information about the file in your folder. First, you need to be aware of the new views that you can use in Windows XP:
The default view of Windows XP is the Tiles view. This view is basically the same as the Icons view, but the icons that are displayed are just a little bigger.
The Thumbnails view is one of the most useful new views of Windows XP.
The Filmstrip view is another very useful view that makes it easy to browse through photos on your computer. It gives you the ability to see a large sample of the image, so that you can see a more detailed preview without having to open
up the file.
The Details view is not exactly a new view, but it has been expanded to include many new fields that display useful file information, such as ID3 tags and image data like dimensions and camera info.
The Details view can be customized like no other view can. All of the columns that are displayed can be resized, removed, rearranged, and more can be added. This can all be accomplished by using some of the lesser-known tricks of the interface. To start off, customize a folder that contains a bunch of MP3 files. By now, you should have already changed the template for this folder to one of the music templates so that you can use the advanced music specific features. If you have not already done that, go back to the last section to find out how. When you are ready, follow these steps to customize all of the different parts of the Detail view:
1. Start off by resizing the columns. To do so, just place the mouse on the vertical line that is displayed between the columns and click and hold the left mouse button while you drag the mouse back and forth.
2. Now, add some of the new columns that display information from the ID3 tags from the MP3 files. Just right-click the column heading and select one of the many new options, such as bit rate. You can even select more items to add from the bottom of the pop-up menu. Repeat this step until you have added all of the new columns that you want.
3. Most likely, there will be some columns that you just don't need. To remove these columns from the Details view, just right-click the column heading and select the item once again to uncheck it. This will instantly remove the column from view.
4. The last part of customizing the view is to set the order of the columns in a way that you like the best. To change the order of a column, just grab the column header and drag it around by holding down the left mouse button and moving the mouse.
If you want to customize the detailed view of a folder that contains other multimedia files such as videos or photos, just repeat the previous steps and you will see additional column features with which you will be able to customize your detailed view.

0 comments:
Post a Comment